GPIO and PWM configuration on Jetson Orin — pinmux, sysfs, and device tree
GPIO and PWM configuration on Jetson Orin involves three layers: the pinmux spreadsheet that decides pin function, a device tree overlay that applies it, and either sysfs or libgpiod for runtime control. Skipping the pinmux step is the most common cause of “GPIO not working” issues — if the pin mux is set to I2C or UART function, sysfs GPIO writes are silently ignored.
Key Insights
- Pinmux must be set before GPIO/PWM works — each pin has a hardware mux selecting its function (GPIO, SPI, I2C, UART, PWM); the mux defaults to non-GPIO on most pins
- Use
gpiodtools, not/sys/class/gpio— the legacy sysfs GPIO interface is deprecated in kernel 5.x;gpioget/gpioset/gpiomonare the correct tools - 40-pin header pin numbers ≠ Linux GPIO numbers — header pin 7 is not GPIO 7; use the pinmux spreadsheet to find the correct
gpiochipXline number - PWM period and duty cycle are in nanoseconds in sysfs — a 1kHz signal is
period=1000000(1,000,000 ns = 1ms) - The fan PWM is pre-configured on devkits —
/sys/class/hwmon/hwmon*/pwm1controls the fan without any DT changes
Pinmux spreadsheet workflow
- Download Jetson Orin Series Pinmux from developer.nvidia.com/jetson-downloads
- Open in Excel or LibreOffice
- Find your target pin (by module pin number or header position)
- Change the “Customer Usage” column to your desired function (GPIO, PWM, etc.)
- Set pull (Pull-Up/Pull-Down/None) and drive strength
- Run the provided Python script to generate a
.dtsifile - Compile to
.dtboand deploy as a device tree overlay
40-pin header GPIO map (Orin NX / Nano devkit)
| Header Pin | Module Pin | GPIO chip | Line | Default function |
|---|---|---|---|---|
| 3 | 191 | gpiochip1 | 0 | I2C1_SDA |
| 5 | 189 | gpiochip1 | 1 | I2C1_SCL |
| 7 | 164 | gpiochip0 | 164 | SPI1_SCK / GPIO |
| 11 | 136 | gpiochip0 | 136 | UART1_RTS / GPIO |
| 12 | 148 | gpiochip0 | 148 | I2S0_SCLK / GPIO |
| 13 | 194 | gpiochip0 | 194 | SPI1_SCK / GPIO |
| 15 | 106 | gpiochip0 | 106 | GPIO |
| 16 | 112 | gpiochip0 | 112 | GPIO |
| 18 | 118 | gpiochip0 | 118 | GPIO |
| 19 | 140 | gpiochip0 | 140 | SPI1_MOSI / GPIO |
Check the pinmux spreadsheet for the authoritative mapping for your carrier board.
GPIO control with libgpiod
# Install gpiod tools
apt install gpiod

# List all GPIO chips
gpiodetect
# gpiochip0 [tegra234-gpio] (164 lines)
# gpiochip1 [tegra234-gpio-aon] (32 lines)

# List lines and their current state
gpioinfo gpiochip0

# Set a GPIO high (output)
gpioset --mode=signal gpiochip0 164=1

# Read a GPIO (input)
gpioget gpiochip0 164

# Monitor for edge events
gpiomon --num-events=10 --rising-edge gpiochip0 164
C program using libgpiod
#include <gpiod.h>
#include <stdio.h>

int main(void) {
    struct gpiod_chip *chip;
    struct gpiod_line *line;

    chip = gpiod_chip_open_by_name("gpiochip0");
    if (!chip) {
        perror("gpiod_chip_open_by_name");
        return 1;
    }

    line = gpiod_chip_get_line(chip, 164);

    /* Request as output, initial value = 0 */
    gpiod_line_request_output(line, "my-app", 0);

    /* Set high */
    gpiod_line_set_value(line, 1);

    gpiod_chip_close(chip);
    return 0;
}
Compile:
gcc -o gpio_example gpio_example.c -lgpiod
Device tree overlay for GPIO pinmux
Generated by the pinmux spreadsheet, or written manually:
/dts-v1/;
/plugin/;

/ {
    overlay-name = "GPIO pin 15 as output";
    compatible = "nvidia,p3767";

    fragment@0 {
        target = <&pinmux>;
        __overlay__ {
            /* Header pin 15 = TEGRA_MAIN_GPIO(A, 6) */
            pinctrl-names = "default";
            pinctrl-0 = <&gpio_pin15_config>;

            gpio_pin15_config: gpio-pin-15 {
                nvidia,pins = "soc_gpio41_pq5";
                nvidia,function = "rsvd1";   /* GPIO mode */
                nvidia,pull = <TEGRA_PIN_PULL_NONE>;
                nvidia,tristate = <TEGRA_PIN_DISABLE>;
                nvidia,enable-input = <TEGRA_PIN_DISABLE>;
            };
        };
    };
};
Load for development:
# Compile
dtc -I dts -O dtb -o gpio-pin15.dtbo gpio-pin15.dts

# Add to /boot/extlinux/extlinux.conf:
# FDT_OVERLAYS gpio-pin15.dtbo

# Reboot
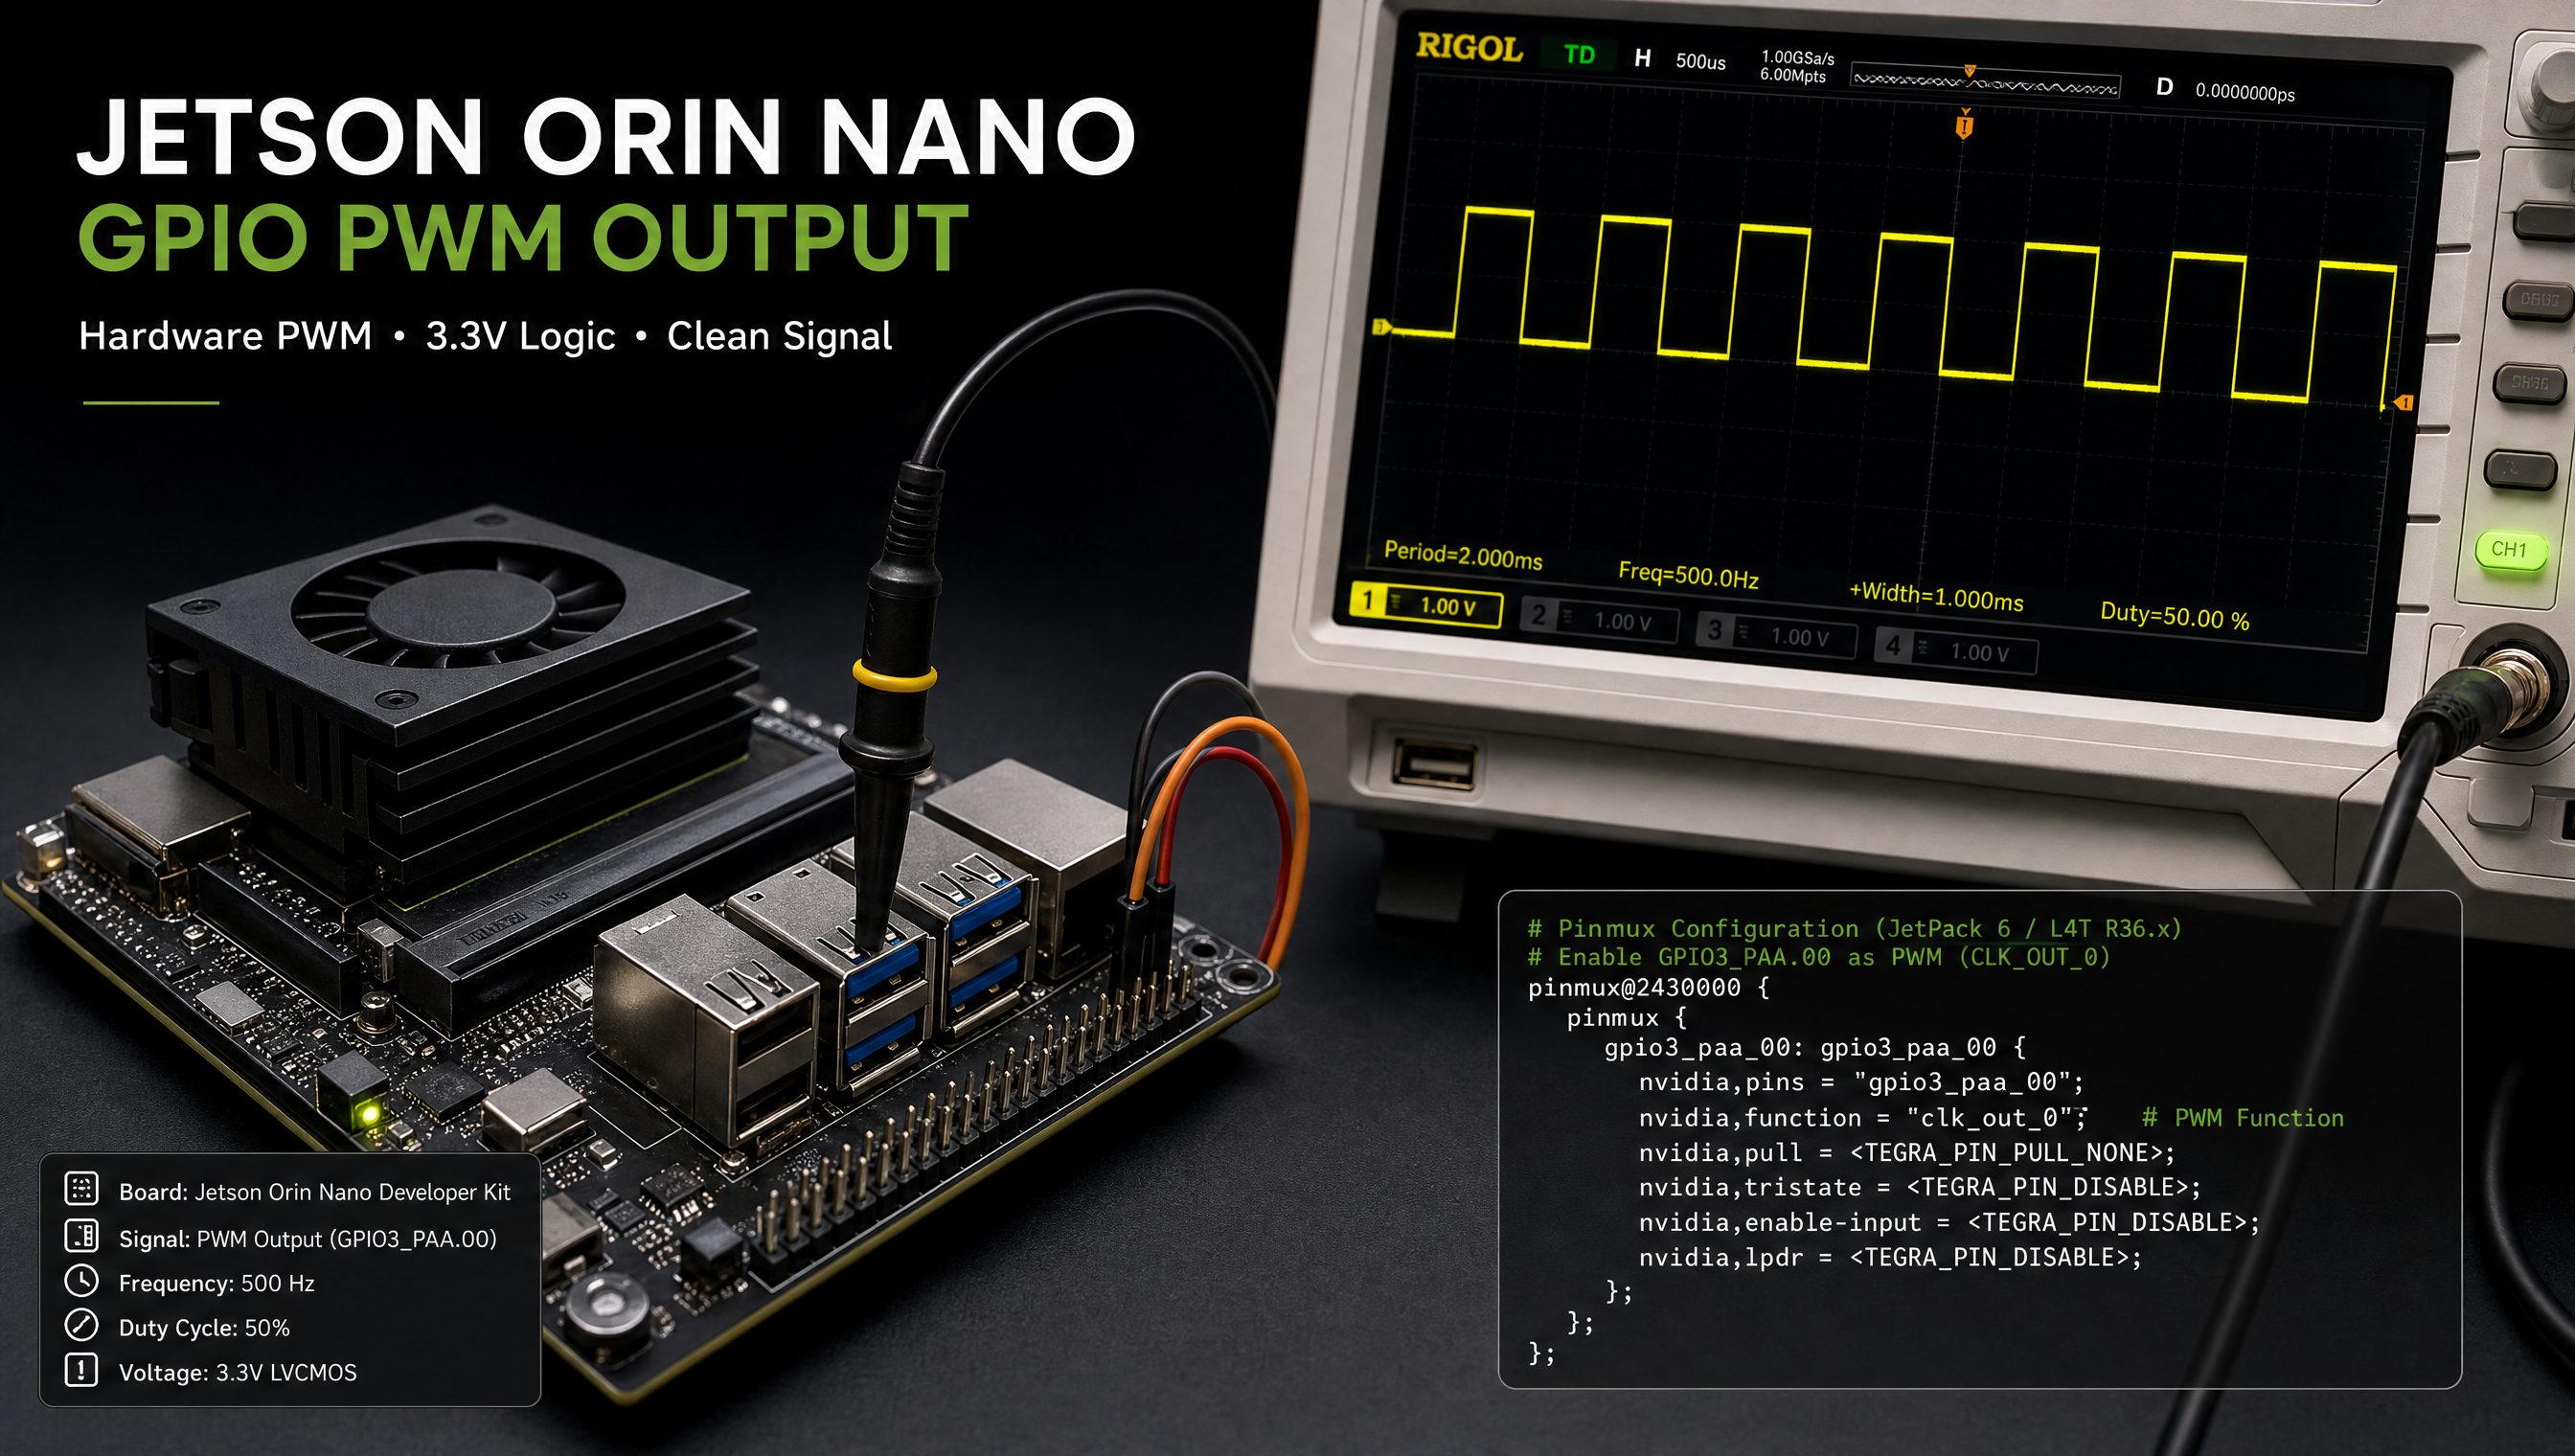
PWM configuration
Jetson Orin has 8 PWM controllers. On the 40-pin header of the devkit:
| Header Pin | PWM chip | Channel | Period range |
|---|---|---|---|
| 32 | pwmchip1 | 0 | 1µs – 10s |
| 33 | pwmchip2 | 0 | 1µs – 10s |
# Export PWM channel 0 on pwmchip1
echo 0 > /sys/class/pwm/pwmchip1/export

# Set period to 1ms (1kHz)
echo 1000000 > /sys/class/pwm/pwmchip1/pwm0/period

# Set duty cycle to 50%
echo 500000 > /sys/class/pwm/pwmchip1/pwm0/duty_cycle

# Enable
echo 1 > /sys/class/pwm/pwmchip1/pwm0/enable

# Verify
cat /sys/class/pwm/pwmchip1/pwm0/enable
# 1

# Disable and unexport when done
echo 0 > /sys/class/pwm/pwmchip1/pwm0/enable
echo 0 > /sys/class/pwm/pwmchip1/unexport
The pin must be configured for PWM function in the pinmux overlay before these sysfs nodes appear. Without the pinmux configuration, pwmchipN may be present but the signal will not appear on the physical pin.
Fan PWM (pre-configured on devkits)
The cooling fan on Orin devkits uses a pre-configured PWM and is managed by nvfancontrol:
# Check fan speed and target
cat /sys/class/hwmon/hwmon*/fan1_target
cat /sys/class/hwmon/hwmon*/pwm1

# Manual control (bypasses nvfancontrol)
systemctl stop nvfancontrol
echo 180 > /sys/class/hwmon/hwmon*/pwm1   # 0-255 scale
For carrier board hardware design including GPIO signal routing and the pinmux spreadsheet download location, see Jetson carrier board hardware design mistakes to avoid.
FAQ
How do I control GPIO on Jetson Orin from the command line?
Use gpioset gpiochipX <line>=1 from the gpiod package. Find the correct chip and line number from the pinmux spreadsheet — header pin numbers don’t match Linux GPIO numbers.
How do I use PWM on Jetson Orin?
Configure the pin for PWM function in a pinmux DT overlay, then use /sys/class/pwm/pwmchipN/. Export the channel, set period and duty_cycle in nanoseconds, then set enable=1.
What is the pinmux spreadsheet for Jetson Orin?
An Excel file from NVIDIA that maps module pins to hardware functions and generates a device tree overlay from your selections. Download from the NVIDIA Jetson Downloads page.
Can I change GPIO pin function without reflashing on Jetson Orin?
Yes. Add a compiled pinmux overlay to FDT_OVERLAYS in /boot/extlinux/extlinux.conf and reboot. No reflash needed for development.
Relevant Services
NVIDIA Jetson Expert Support
Stuck on a Jetson bring-up?
We've debugged this failure mode before. BSP, device tree, camera pipelines, OTA, most blockers clear in the first session. No long retainers. No guessing.
Frequently Asked Questions
How do I control GPIO on Jetson Orin from the command line?
Use the sysfs GPIO interface or the gpiod userspace tools. First identify the correct GPIO number using the pinmux spreadsheet — the 40-pin header on the Orin devkit does not use sequential Linux GPIO numbers. Then use gpiod: gpioset gpiochip0 <line>=1 to set a pin high. Avoid the legacy /sys/class/gpio interface on kernels 5.x and later — it is deprecated.
How do I use PWM on Jetson Orin?
Jetson Orin has dedicated PWM controllers accessible via the /sys/class/pwm interface. First configure the pin in the pinmux spreadsheet and device tree overlay to PWM function. Then enable the PWM chip via sysfs: echo 0 > /sys/class/pwm/pwmchipN/export, set period and duty_cycle in nanoseconds, then enable=1. The fan control PWM on the devkit is already configured and accessible.
What is the pinmux spreadsheet for Jetson Orin?
The pinmux spreadsheet is an Excel file from NVIDIA (Jetson Orin Series Pinmux) that maps each module pin to its available functions (GPIO, I2C, SPI, UART, PWM, etc.) and lets you configure the mux selection, pull, and drive strength. The spreadsheet generates a device tree overlay that matches your selections. Download it from the NVIDIA Jetson Downloads page.
Can I change GPIO pin function without reflashing on Jetson Orin?
Yes, using a device tree overlay loaded via extlinux.conf. Add your pinmux overlay DTB to FDT_OVERLAYS in /boot/extlinux/extlinux.conf and reboot. This is faster than a full reflash during development. For production, include the overlay in TEGRA_PLUGIN_MANAGER_OVERLAYS to write it to SPI flash.

Written by
Aarón AnguloCo-Founder & CEO · ProventusNova
Obsessed with client outcomes. Aarón ensures every engagement delivers real results, on time, on scope, no exceptions.
Connect on LinkedInRelated Articles
Jetson camera works with v4l2-ctl but fails to launch argus_camera — debug guide
Why your Jetson camera works with v4l2-ctl but argus_camera fails — tegra-camera DT node issues, sensor mode tables, and the V4L2-to-Argus fault path.
How to enable CSI0 on Jetson Orin in the device tree
Enable CSI0, CSI1, and CSI2 on Jetson Orin by configuring nvcsi and VI device tree nodes, port status, and lane count in your DT overlay.
GMSL YUV422 capture and FORCE_FE errors on Jetson Orin — debug guide
Debug GMSL YUV422 capture issues on Jetson Orin — FORCE_FE decoder config, partial frame faults, and MAX9295/MAX9296 YUV format setup.
nvcompositor vs parallel GStreamer pipelines on Jetson Orin — when each is slower
When to use nvcompositor vs parallel GStreamer pipelines on Jetson Orin, why compositor is slower, and how to choose the right path for your workload.