I was thinking it was a good time to revisit the Single Shot Detection (SSD 300) implementation on PyTorch for object detection for good old times, trying not to use a pre trained network (a pre-trained VGG was valid), just to see how it performed.
While doing this I stumbled upon a perfectly written repository in GitHub: https://github.com/sgrvinod/a-PyTorch-Tutorial-to-Object-Detection. Here it explains the basics of the whole implementation of the SSD in a perfect way. And the best part is that it comes with all the necessary code to run it using PyTorch! So, let’s give it a try.
First things first, let me tell you the system where I am running it, I am currently using an Ubuntu 24 distribution, with Python 3.11, CUDA 12.5 and PyTorch 2.4.0.
Now let’s get started, the first step you want to do is to clone the repository for SSD detection with PyTorch:
git clone https://github.com/sgrvinod/a-PyTorch-Tutorial-to-Object-Detection.git
cd a-PyTorch-Tutorial-to-Object-Detection
Then you will need the training/validation datasets, in this case the example uses the VOC2007 and VOC2012, which can be obtained from http://host.robots.ox.ac.uk/pascal/VOC/voc2007/ and http://host.robots.ox.ac.uk/pascal/VOC/voc2012/. You just need to decompress them into any folder you want.
Without further ado, let’s go deeper into the training of the SSD network on PyTorch:
First off, prepare the dataset:
# Modify the create_data_lists.py file
# and set the paths accordingly to where you put the dataset
.../VOCdevkit/VOC2007 and .../VOCdevkit/VOC2012

# Then run it to create a map of the dataset
python3 create_data_lists.py
Second, run the train script:
python3 train.py
And third, the script will always save the model weights as a checkpoint to the checkpoint_ssd300.pth.tar file. So, in order to re-use it if you want to stop training and then train again later, just change the path inside the train.py file similar to:
checkpoint = "<path to checkpoint_ssd300.pth.tar file>"
Finally, using the trained network for detection (make sure to set an image file path inside the detection script):
# Run the detection script
python3 detect.py
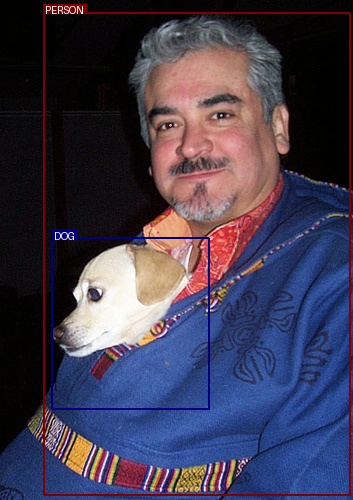
I ran into some issues with the font, but you can just change it to whatever you’d like in your system. After these simple steps, I was able to obtain the following detections over the image, meaning that our experiment was worth it!


